If you have never used backup software before, however, you might feel some trepidation, needing a little extra guidance to get you started. This article contains a high-level overview of the core functionality of Macrium Reflect. Each section includes additional links for more in-depth assistance.
Create rescue media
We recommend that the first time you use Macrium Reflect, you create bootable rescue media before performing any other tasks.
Click the 'Rescue' icon to access the Rescue Media Builder wizard.
For further guidance see this article.
Imaging disks
Disk imaging is a backup task and can be accessed from the Create Backups taskbar.

For further guidance see creating a backup of your computer.
Differential and Incremental Disk Images
After your first full image, you can run differential and/or incremental images to capture changes made since the full image was created. Differential images capture all changes since the last full, and incremental images capture changes since the last image of any type. This is usually substantially faster than creating another full backup and also gives you the same number of restore points and flexibility. Differential and incremental images create image 'sets' that contain a chain of dependent image files. Macrium manages these image sets for you.
Right-click the backup definition that you want to run and select the type of image to create.

For more information see differential and incremental disk images.
Backing up Files and Folders
Creating full, differential, and incremental backups of specific files or folders can optimize backup speed and reduce disk space requirements. The wizard can be accessed under the 'Create Backup Tasks' menu:
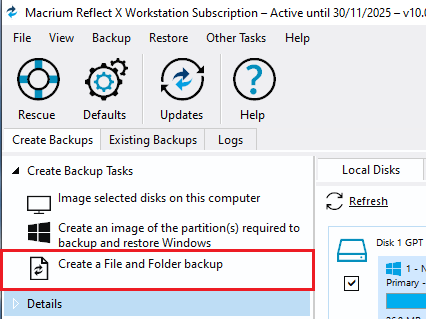
For more information see backing up files and folders.
Cloning Disks
Cloning is particularly useful if you are upgrading to a new, larger hard drive or if you need to quickly swap failed disks out of your system.
To open the clone wizard, select the disk or partition you require from the 'Create Backups' tab and click 'Clone this disk'.

For more information see cloning a disk.
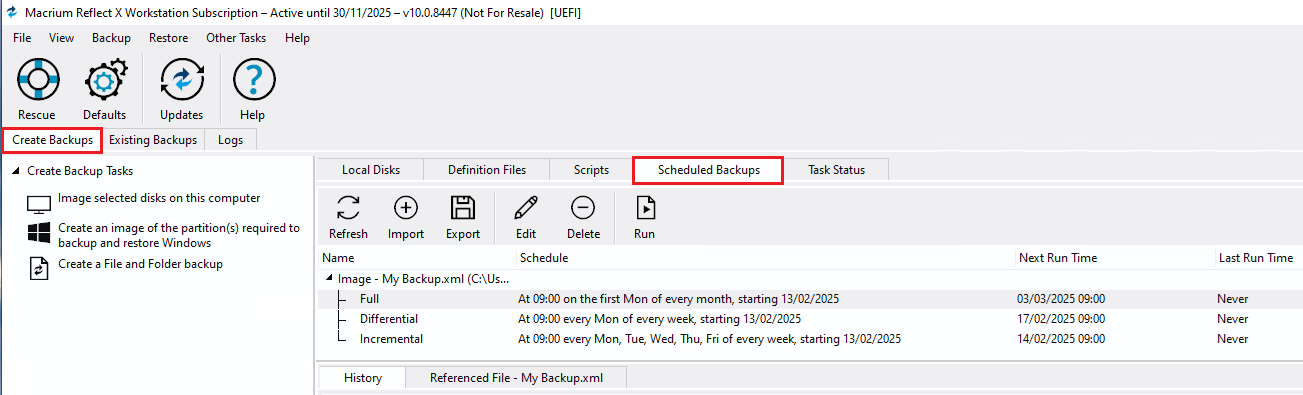
Scheduling, Retention, and Disk Space
Whenever you create a backup, regardless of the type, you have the option to create a backup plan using the scheduling and retention wizard.
During one of the backup wizards, click below 'Select a Template for your Backup Plan' to select from industry best practice backup plans templates, quick-start backup plan templates, or even templates that you have created. You can even skip over scheduling to simply take advantage of the retention rules for managing your disk space.

You can then customize the plan to suit your needs. You can view, edit, cancel, or run scheduled backups from the 'Scheduled Backups' tab nested under the 'Create Backups' tab:
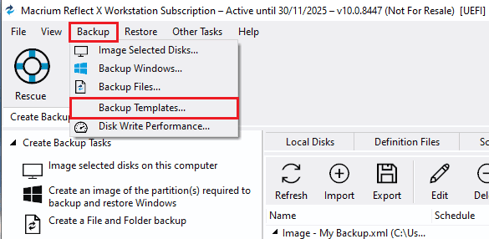
Backup plan templates
Macrium Reflect includes templates for automating industry best practice backup plans that help you maximize retention for your available storage space. These can be accessed and modified, or you can create your own backup templates.
To manage backup plan templates click Backup and select Backup Templates...
For more information about using backup templates see scheduling backups. For more information about retaining backups and backup plans see retention and consolidation.
Restoring Files and Folders
To directly restore the contents of a file and folder backup use the Macrium Reflect file and folder restore feature.

For more information see Restoring a file and folder backup.
Restoring Images
To launch the restore wizard, select the 'Existing Backups' taskbar, choose the image you want to restore, then click 'Restore'.
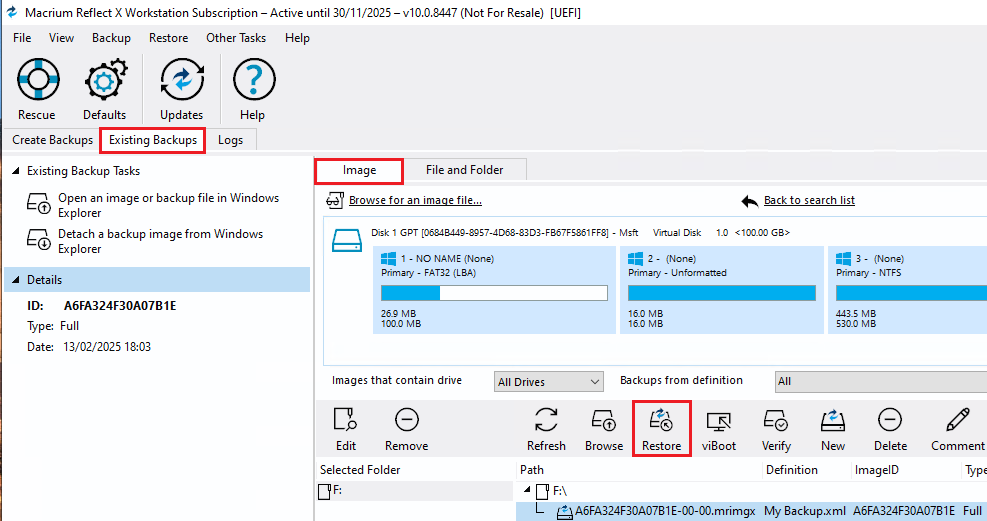
For more information see restoring an image from within Windows.
Note: If you are unable to boot Windows you can still restore an image by booting from the Macrium Reflect rescue media and using the temporary Macrium Reflect to find and restore images.
ReDeploying Computers
Macrium ReDeploy is included in all licensed editions of Macrium Reflect, this excludes Macrium Reflect trials. With ReDeploy you can restore an image to a replacement computer or even create various types of virtual hard drives to virtualize the machine, a technique sometimes called physical to virtual restores or P2V. ReDeploy modifies an existing offline operating system to work with new hardware.
- Restore your system image to the PC being deployed before running ReDeploy. There is no need to reboot your PC after restoring an image and before you run ReDeploy.
- Boot the target PC with the Windows PE rescue CD or USB equivalent.
-
In the 'Existing Backups' tab, select 'ReDeploy Restored Image to new hardware'.
For more information see this article.
Managing Macrium files in Windows
Wherever you browse for files in Windows programs or Windows Explorer, you can find Macrium Reflect functions by right-clicking on drives or Macrium files. If you have file extensions showing, Macrium files have the extensions .mrimgx for images or .mrbakx for file and folder backups. Otherwise, you can look for the Macrium Reflect icons next to the file.
With Macrium Reflect installed, directly from Windows you can:
- Image drives
- Run Macrium XML definition files
- Mount and unmount images for browsing
- View file Macrium properties in the file properties dialog
- See comments in Windows Explorer columns
- See a popup summary of the file contents by hovering the mouse pointer
However, the best way to view backup sets is in the Macrium Reflect interface itself where it can automatically collate the multiple files involved in incremental and differential backups and you can manage them as a set.