- Booting the Target Endpoints
- Initiating the Deployment using the SiteDeploy Server
Overview
The golden images can now be deployed to the target computers using the deployment media. Centrally initiated deployments make it easy to deploy to multiple endpoints simultaneously, as well as enable Sysprep Answer Files to automate the OOBE on the target endpoints.
Once a computer has been booted with the deployment media, centrally initiated deployments can be fully performed and managed using the central SiteDeploy server.
Booting the Target Endpoints
First, boot the computers using the deployment media. Since the deployment media can contain multiple versions of Windows PE, you may need to select the correct version for the computer you are using.
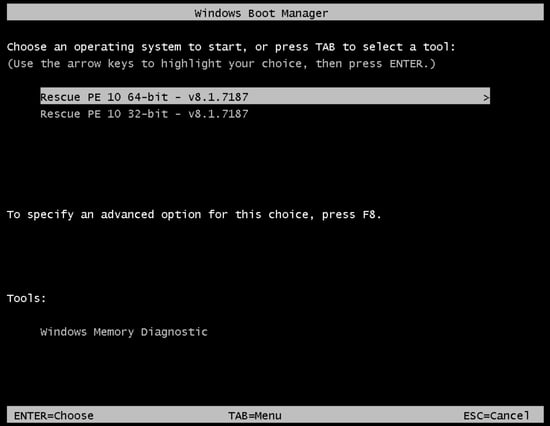
If the CPU architecture of the computer is 32-bit, then you will need to select a 32-bit version of the deployment media, otherwise, a 64-bit version of PE should be used. If the computer has UEFI firmware, then it is recommended that a PE 10 version of the deployment media is selected, if the computer has BIOS firmware, then a PE 3.1 version should be used.
If the in-box PXE server is being used to boot the deployment media on the endpoints, the relevant booting option will be selected for the endpoint automatically.
Once the deployment media has booted, the PE Agent will be displayed:

The deployment can now be initiated using SiteDeploy (centrally-initiated deployment) without a user needing to authenticate; alternatively, a guided deployment can be initiated locally on the target endpoint once a user has authenticated (endpoint-initiated deployment), this article contains more information about performing an endpoint-initiated deployment.
Initiating the Deployment using the SiteDeploy Server
Computers
Once the target computer has been booted with the deployment media, it will be shown in the ‘Deployment Targets’ tab of SiteDeploy. If the MAC address of the computer, that has been booted with the deployment media, matches the MAC address of a computer that is being managed using SiteBackup, then the name of the computer will be shown. If the MAC address does not match any computers that are being managed by SiteBackup, then the name will show 'Recovery:X' with incrementing numbers:

This 'Recovery:X' number will also be shown in the PE Agent on the target endpoint and can be used to match the target endpoint against the 'Deployment Targets' in SiteDeploy®:

The computers can be expanded to see more information about their hardware. This information can also be used to help identify the endpoints:

Select the endpoint(s) that will be the target for the deployment using the checkbox shown next to each endpoint, then select ‘Deploy.’
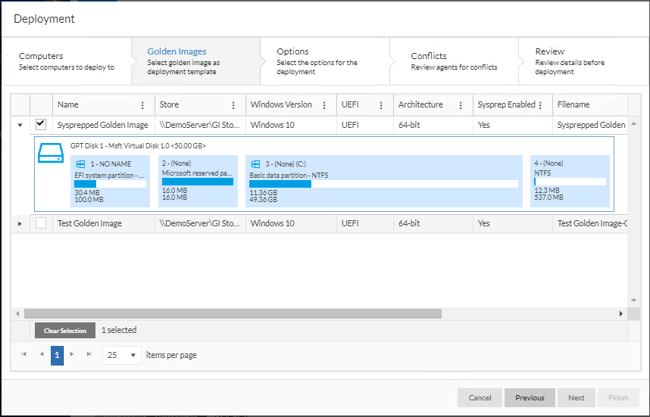
Golden Images
A list of available golden images will be displayed in the window that opens. The arrow next to the golden images can be used to display the partition structure that was included in the golden image.
Options
On the 'Options' page of the wizard, additional options can be specified for the deployment.

The options for the deployment are:
Rapid Delta Restore - Only changed blocks are deployed to the target computer meaning the deployment will be completed much faster. This only applies when restoring an NTFS volume and the target has a version of the imaged file system (e.g. when deploying an image to a computer that has previously had the same image deployed to it). You can read more about when rapid delta restore will be used in this article.
SSD TRIM - Affects restore operations to SSD only. During the deployment, unused blocks on the SSD will be flagged using a TRIM operation. Writing to an unused block is much quicker than an in-use block as it avoids both the slow erase operation and the read-modify-write cycle. This results in an increase in both the lifetime and the performance of the device. It is effective for all Windows operating systems, even those that support SSD trim as the file system driver can only TRIM blocks on de-allocation; it cannot TRIM blocks written by another process. It is also effective for USB-attached SSDs.
Resize image to fit disk - The partition(s) will be copied to the target and all extendable/shrinkable partitions will be proportionately resized, so all partitions fill the disk. Extendable and Shrinkable partitions are all non-system partitions, and drive C, that are formatted using either NTFS or FAT32.
Enable ReDeploy - When selected, this option will enable Macrium ReDeploy. Once the golden image has been deployed, Macrium ReDeploy will inject the relevant storage driver into the deployed operating system. This will ensure that the operating system is bootable after being deployed to a different storage device to where the golden image was created.
Sysprep answer file - When this option is selected a Sysprep answer file will be copied to the target computers post-deployment. The Sysprep answer file can be used to perform post-deployment tasks like renaming the computer and skipping the Out of Box Experience (OOBE). This article contains more information information about Sysprep answer files. The Sysprep answer file is only available when deploying a Sysprepped golden image. If the golden image has not been Sysprepped this option will be unavailable, as the deployed operating system will not enter the OOBE.
Sysprep answer file options
When 'Sysprep answer file' is selected, additional options will be displayed that can control the variables in the answer file, changing the values on the deployed operating system.
Computer name - These options can be used to specify a naming convention for the target computers.
Use Agent Name if Available - When this option is selected, if the endpoint is also managed for backups by SiteBackup, the computer name of the agent computer will be used instead.
Use existing device name fom Windows installation if available - When deploying to an endpoint that has an existing operating system, if this option is selected, the Windows name from the existing operating system will be applied to the deployed operating system. This can be especially useful when resetting existing systems back to a clean state and ensures that they will not need renaming post-deployment.
Computer Name template - This option can be used to specify the target endpoint(s)' names post-deployment. The '{nn}' variable will increment with each endpoint that is deployed. The number of 'n' that is specified will control the number of padding zeroes. For example {nn} would be 01, and {nnn} would be 001.
Auto Name Start Num - This option specifies the starting number for the '{nn}' variable. For example, if 100 is specified, the first endpoint will be numbered 101.
Create Computer Account - This option is used to create a computer account on the deployed operating system, this can either be a 'Built-in Administrator' or 'Local account', a password can also be specified for the account.
Join Computer to a Domain - This option enables a deployed endpoint to be joined to a domain. Domain user credentials should be specified to enable the computer to join the domain.
If one of the fields is left blank, you may be prompted to complete the relevant section of the OOBE on the deployed operating system.
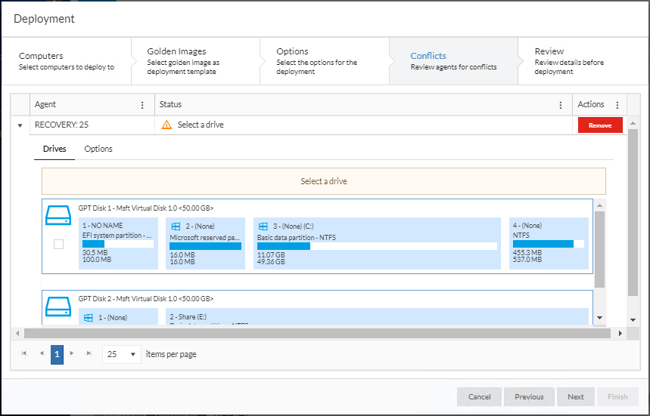
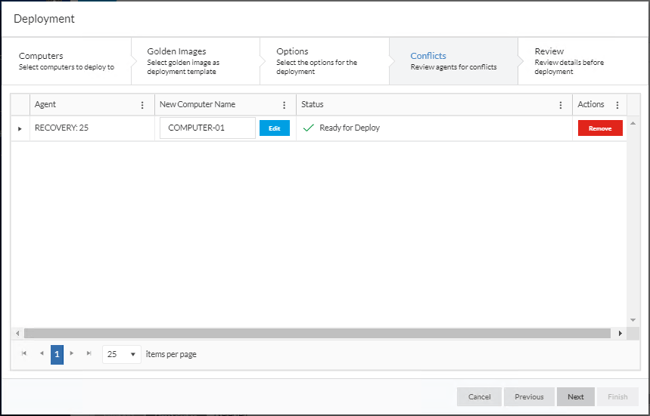
Conflicts
On the next page of the wizard, the deployment is checked for conflicts. A conflict is something that requires interaction from the deployment operator. For example, if you are deploying to a computer with multiple disks, the deployment operator will need to select the disk that will be used as the destination.
Once the conflict has been resolved, the computer will be shown as ‘Ready for Deploy’:
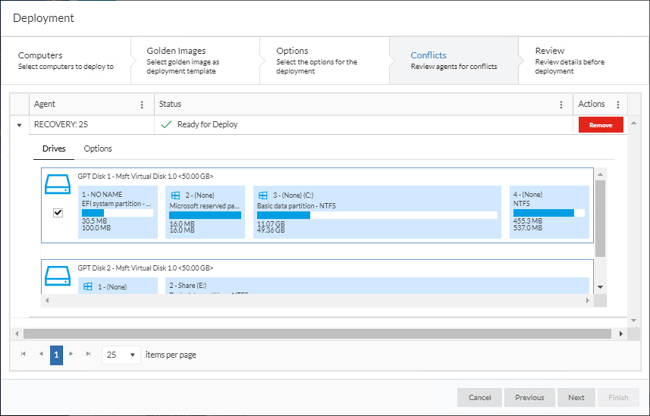
If the 'Sysprep answer file' option is selected on the 'Options' page of the deployment wizard, the post-deployment name of the endpoint will be shown in the 'New Computer Name' column. The new computer name of each computer can be overridden with a different name by selecting 'Edit'.
Review
The final page of the deployment wizard will show a summary of the deployment that will take place. Select ‘Finish’ to start the deployment:
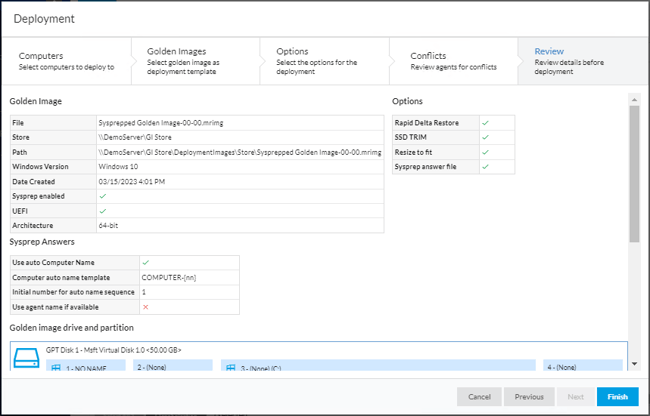
The golden image will then be deployed to the computers that were specified.
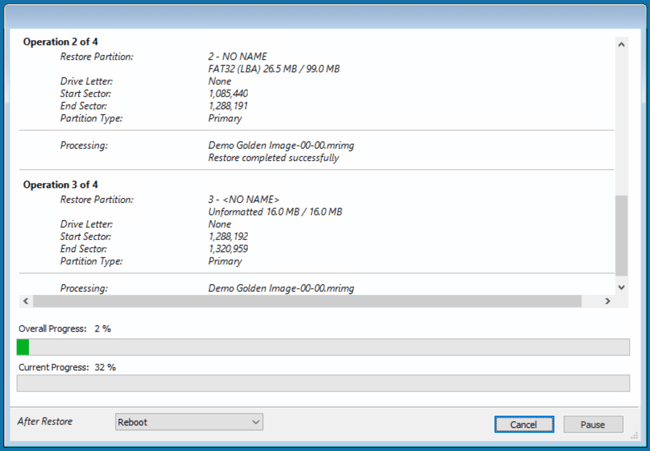
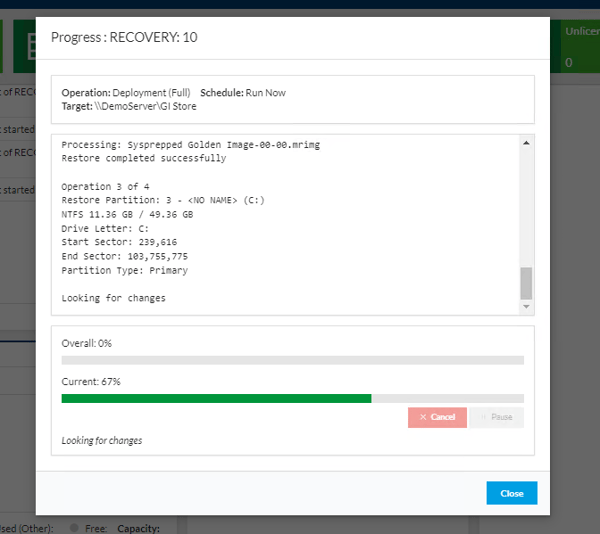
Viewing Deployments
The progress of the deployment can be monitored from the endpoint:
The progress of the deployment can also be monitored on the 'Dashboard' page of the SiteManager Platform
The target computer will reboot automatically once the deployment has been completed.